
Protecting your information has become increasingly important and businesses now require that you comply with business standards and industry regulations to ensure the sensitive data is kept safe. Although it has become easier to communicate with other colleagues than ever, this also introduces potential disclosure of sensitive data like financial data or PII (personally identifiable information) i.e. credit card numbers, SSN, or even health records. Luckily Microsoft has something called the Security & Compliance Center where you can create a DLP policy to identify, monitor, and automatically protect your sensitive information across Office 365. The DLP policy touches many O365 products like: Exchange Online, SharePoint Online, OneDrive for Business, and Microsoft Teams. However, today we’ll be focusing specifically on DLP within Teams but first for those of you not familiar with DLP we’ll give a quick overview of how it works within Office 365.
What is DLP?
To put things simply data loss prevention (DLP) consists of a policy that regulates accidental sharing of sensitive information. So how does it do this? Well, a DLP policy protects content in Office 365 by enforcing rules which comprise of Conditions and Actions. For conditions, DLP will look for content that matches the condition before the rule will be enforced. For example, a rule may be configured to look for a credit card number or SSN being shared outside of your organization. In addition you have actions. Actions consist of taking action automatically when content matching the condition is found. For example, if you had a rule configured to block access to a document and in turn notify the user and compliance officer an email notification if compliance has been compromised. As mentioned earlier, there are also different locations where DLP can take place to protect your content: Exchange Online, SharePoint Online, OneDrive for Business, and Microsoft Teams (chats and channels).
DLP Rule Overview
So from the top level you have your DLP policy, which is comprised of one or more rules. Each rule will also contain conditions and actions. For each condition that is met, an action is taken automatically. Lastly, each rule is executed in a sequential order and starts with the highest priority rule in each policy. These rules then provide the options to notify users (via policy tips/email notifications) and admins (via incident reports) that a specific piece of content matched the rule. It is important to understand that rules have specific components to them:
- Conditions
- Determines the type of information you are looking for and when to take action. As mentioned earlier conditions focus on the content of the message (types of information) as well as the context (whom the document is shared with).
- For a deeper dive on this topic, checkout the link here.
- Determines the type of information you are looking for and when to take action. As mentioned earlier conditions focus on the content of the message (types of information) as well as the context (whom the document is shared with).

- Actions
- When content matches a condition in a rule, you can apply certain actions automatically to help protect the content.

- User notifications
- Help educate your users on the correct practices for organization compliance and industry regulations.

- User overrides
- Allow your users to override the policy if they have a business justification. Afterwards admins have the ability to view reports on the overrides.

- Incident reports
- When rules are matched, you can send incident reports to your compliance officer (or anyone else) with details around the event. Reports include:
- Information about the item that was matched
- Actual content that matched that rule
- Name of the user who last modified the content
- The rule’s severity level
- An attachment of the original message that matched the DLP policy (for email messages)
- When rules are matched, you can send incident reports to your compliance officer (or anyone else) with details around the event. Reports include:

Still with me here? If you now have a high level understanding of how DLP works, I’d say you’re safe to progress onto this next section where we’ll discuss how DLP works in Microsoft Teams!
DLP in Microsoft Teams

With the recent update for Microsoft Teams, DLP has been extended into this product. With this new enhancement comes the capability of defining policies to regulate the sharing of sensitive data in a Microsoft Teams channel or chat session. Here would be a few real-world examples of each scenario:
- User A (Contoso) tries to share his/her SSN with User B (Perficient) whom is outside of his/her organization via channel or chat. With the DLP policy in place User A will receive a notification that the information he/she just sent was blocked. In addition, the content that was just sent will be deleted automatically per the policy you have configured. You’ll also notice in the screen shot below, there is a “What can I do?” policy tip for the end user which will give them options on how to resolve the issue. If the sender clicks on this, they will have the option of overriding the policy and sending the message regardless or reporting this to the admin to notify them that they don’t believe this message contains any sensitive data.
Note: The admin can choose whether or not to allow the override of the DLP policy. In addition, when configuring the policy tips you have the option of using the default policy tips, or custom policy tips.


- User A (Contoso) tries to share a document with guests (Perficient) in a Teams chat or channel. If the document contains sensitive information and a DLP policy is in place to prevent this, then the document will not open for that subset of users.
Note: In example 2, you will need a DLP policy defined for SharePoint and OneDrive in order for the proper protection to be in place.
So this is what the sender would see, but what about the recipient of the message? Well in the image below the recipient will see a message indicating the “message was blocked due to sensitive content“. In addition, they will have the option of clicking on the “What’s this?” link which will open up an article about DLP policies, where this will explain why the message was blocked.

Customizing Policy Tips
Earlier I mentioned you had the ability to use the default policy tips or create custom policy tips. If you’ve opted to customize your policy tips you can do so by:
- Go to the Office 365 Security and Compliance Center (https://protection.office.com) and sign in.
- Go to Data loss prevention > Policy
- Select a policy, and then go to Policy Settings. From there choose Edit
- Either create a new rule, or edit an existing rule for the policy
- To customize the policy tip for that particular rule go to the User Notifications tab and select Customize the email text and/or Customize the Policy tip text options
- After you have specified the text you want to use for the email and/or policy tips, choose Save.
- Then on the Policy Settings tab choose Save.
Note: To perform this task, you must be assigned a role that has permissions to edit DLP policies. To learn more, see Permissions.
Modify Existing DLP Policies
Let’s say you already have a DLP policy in place and want to apply this policy for Microsoft Teams? Well you can do this by:
- Go to the Office 365 Security & Compliance Center (https://protection.office.com) and sign in.
- Go to Data loss prevention > Policy
- Select a policy, and then look at Locations. If you see “Teams chat and channel messages” in the locations list then you’re all set and you can disregard the next step
- If not, click Edit and check the Teams chat and channel messages option

Note: You have the option of keeping the default settings of all accounts, or specifying which accounts to include/exclude. Also, to perform this task, you must be assigned a role that has permissions to edit DLP policies. To learn more, see Permissions.
Creating a new DLP Policy for Teams
- Go to the Office 365 Security & Compliance Center (https://protection.office.com) and sign in.
- Choose Data loss prevention > Policy > + Create a policy.
- Choose a template, and then choose Next.
In our example, we chose the U.S. Financial Data
- On the Name your policy tab, specify a name and description for the policy, and then choose Next.

- On the Choose locations tab, keep the default setting of all locations, or select Let me choose specific locations, and then choose Next.
If you opted to choose specific locations, select the locations for your DLP policy, and then choose Next.
- On the Policy settings tab, under Customize the type of content you want to protect, keep the default simple settings, or choose Use advanced settings, and then choose Next. If you choose advanced settings, you can create or edit rules for your policy. (To get help with this, see Simple settings vs. advanced settings.)

- On the Policy settings tab, under What do you want to do if we detect sensitive info?, review the settings. (Here’s where you can choose to keep default policy tips and email notifications, or customize them.)
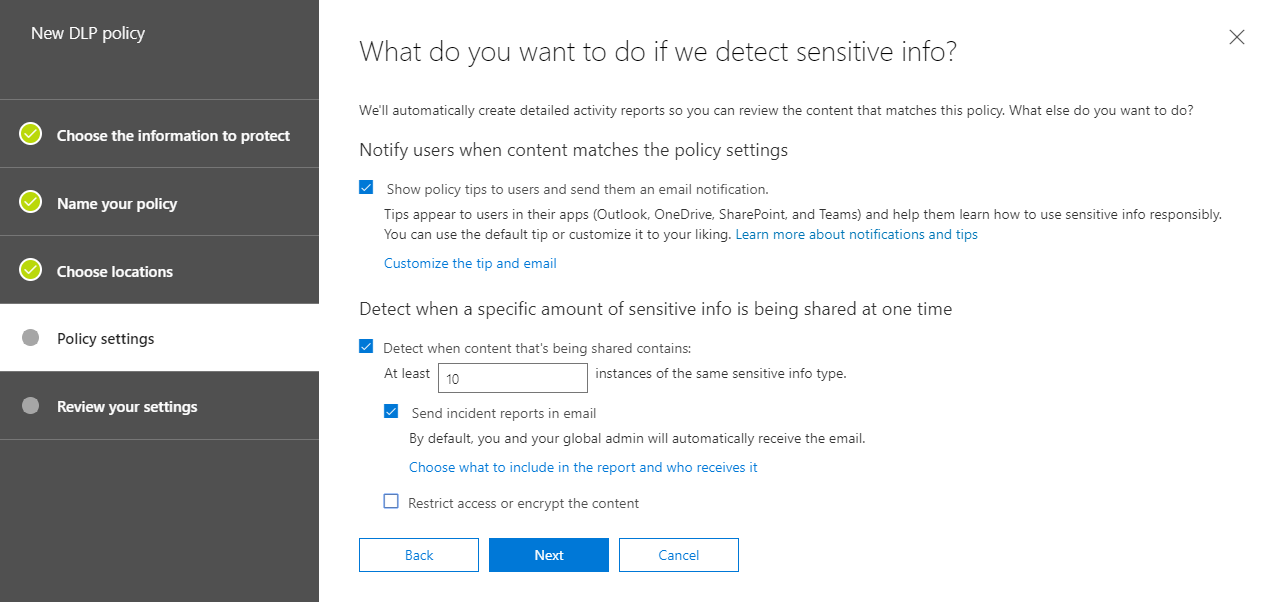
- When you’re finished reviewing or editing settings, choose Next.
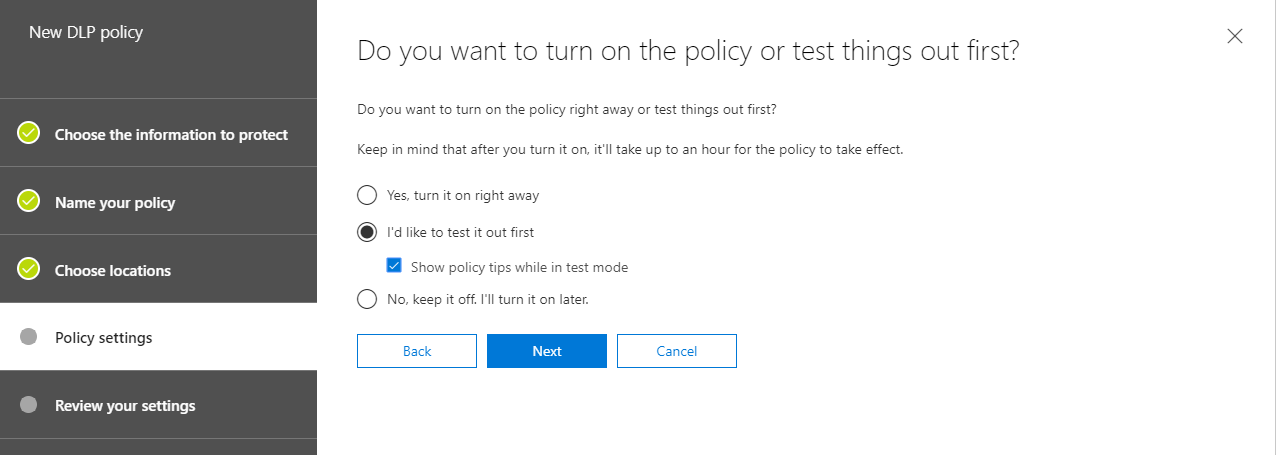
- On the Policy settings tab, under Do you want to turn on the policy or test things out first?, choose whether to turn the policy on, test it first, or keep it turned off for now, and then choose Next.
- On the Review your settings tab, review the settings for your new policy. Choose Edit to make changes. When you’re finished, choose Create.

Note: To perform this task, you must be assigned a role that has permissions to edit DLP policies. To learn more, see Permissions.
Congratulations! You’ve learned how DLP works (to a certain degree), how it works within Teams, and how to create/modify your own policies in Teams to help your organization remain compliant and follow business standards! If you want a deeper dive on this subject feel free to check out the Microsoft docs article here. I hope you have found this quick blog helpful and hope you check back soon for the latest Teams news!