
Once we’ve completed the build pipeline setup and it’s running successfully, it’s time for the final step in your process: setting up the release pipeline. The release pipeline is used to deploy the artifact generated by the build pipeline to a server.
Follow the steps below to set up the release pipeline:
- Set up the Deployment Group. A deployment group is a logical set of deployment target machines that have agents installed on each one. Deployment groups represent the physical environments, such as “Dev,” “Test,” “UAT,” and “Production.” In effect, a deployment group is just another grouping of agents, much like an agent pool.
Follow the steps shown in the video below for setting up the deployment group.
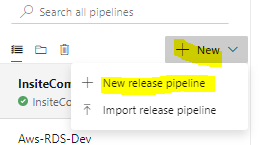
- Once the Deployment Group is set up and starts showing online, navigate to the pipeline and click “+ New” and choose “New release pipeline.”
Note: InsiteCommerce is now Optimizely B2B Commerce
You will see the options “Artifacts” and “Stages” on the new pipeline configuration page.

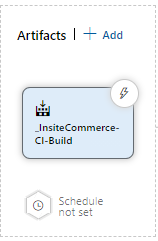
- “Add an artifact” allows you to choose from where you want to pick the artifacts.
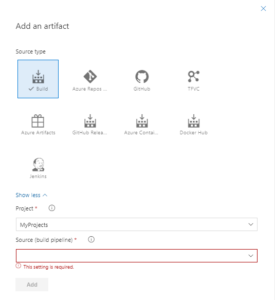
- We are using the “Build” option as a source type because my project repo is on the same Azure DevOps environment. After selecting the source type, you need to select the Project and Source (build pipeline).
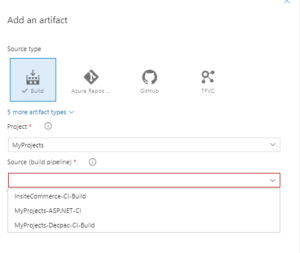
- Select the Source (i.e. Name or ID of the build pipeline that publishes the artifact).
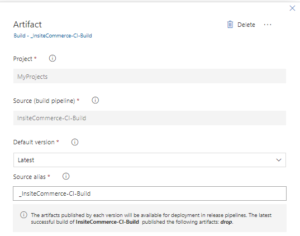
- Select default version “Latest” to deploy the latest build artifact when the release pipeline is executed. The version can be changed for manually created releases at the time of release creation.
- It’s time to set up the stages once the artifact is set up. A stage in a release pipeline consists of jobs and tasks.
- To add a stage in your release pipeline, select the “Add” and click “New stage release pipeline” on the releases page.
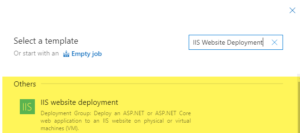
- After adding a stage, add the task (job) by selecting the empty job or using the pre-defined template, such as “IIS Website Deployment.”
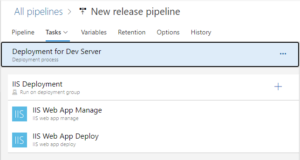
- Once you’ve added the stage, you must now configure the task (job), which will require you to deploy the artifacts generated by the build pipeline to the server.

Below are the minimum tasks required to configure to deploy the web application into the IIS (Web Server):
Check out the video for details on the task added in the stage configuration:
Simple and Easy Pipeline Processes
Following these simple, seamless steps can ensure proper release pipeline setup to your application. Technical processes can be easy as long as you have the right partner like Perficient to help you. For more information on these technical processes, contact our experts today.