
In the first part of this series, I discussed the power of Red Hat’s Compliance Operator for securing your OpenShift 4.x clusters. I gave a quick overview of the installation and then walked through how to initiate compliance scans and review the high-level results. I also showed the power of the Compliance Operator by applying all of the automated remediations that come with the operator.
In the second part, I extracted the results from my scans and generated a nice OpenSCAP Evaluation Report in HTML format, as well as a simple task list for the remaining items that require manual remediation.
In the final post of this series, I’ll walk through how to apply MachineConfigs to do some of the remaining remediations that might be specific to your environment. While this post isn’t designed to fully explain MachineConfigs, I will walk through creating one.
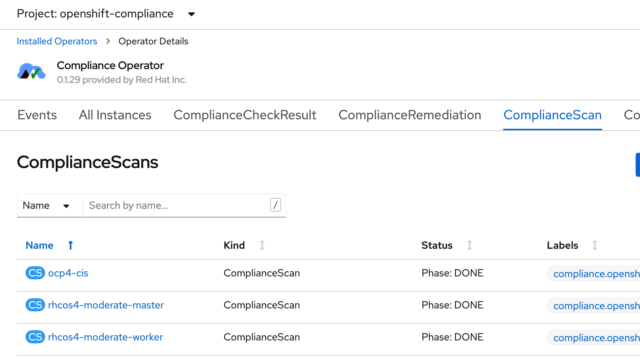
If you recall from my first post in this series, I ran scans against my worker and master nodes, as well as the OpenShift Container Platform itself. I showed how you can see the results of those scans in the ComplianceScan tab of the operator:
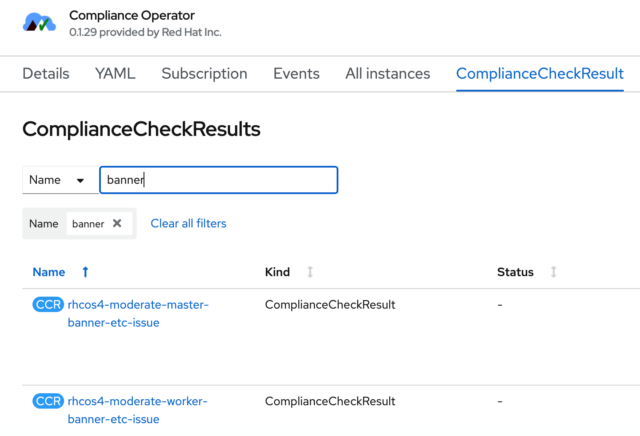
The checks for each of those individual scans are listed under the ComplianceCheckResult tab of the Compliance Operator. I’m going to work with one that is easy to see the result, and that’s the login banner of the nodes. As you can see below, there was a check for the master nodes and a similar check for the worker nodes. I’ll work with the masters here.
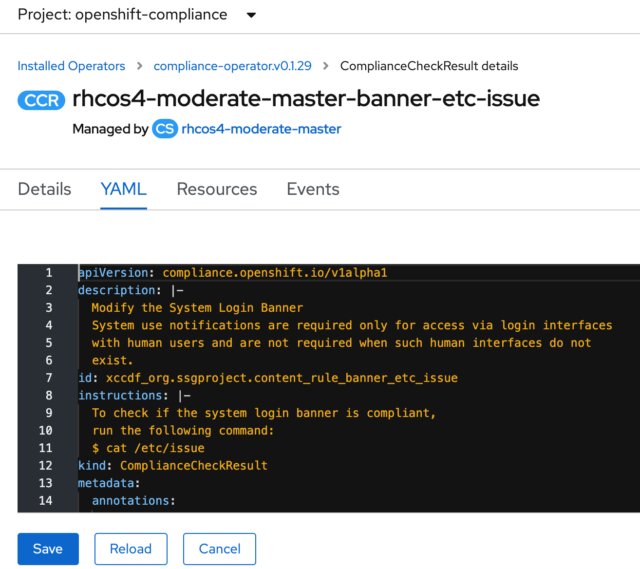
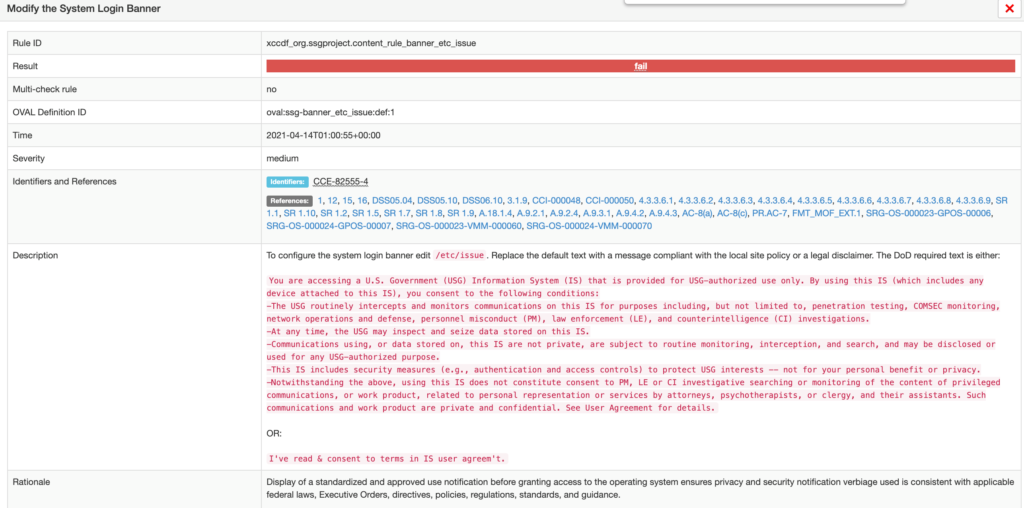
As you’ve seen, the operator provides lots of useful information. In the YAML file of the ComplianceCheckResult, there is a good explanation of what was being checked.
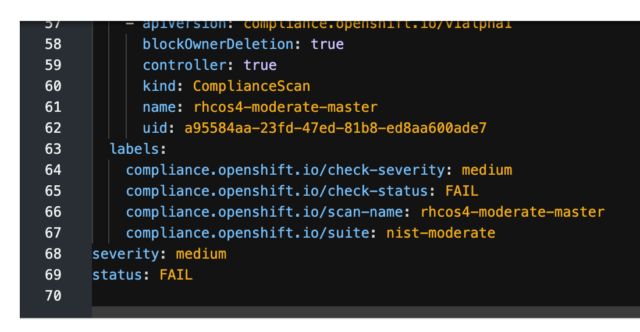
The bottom of the YAML file also shows the result of the scan, which in this case, was a fail.
The OpenSCAP HTML report that was generated also provides good information about this particular finding.


Unlock Your Potential with Application Modernization
Application modernization is a growing area of focus for enterprises. If you’re considering this path to cloud adoption, this guide explores considerations for the best approach – cloud native or legacy migration – and more.
If I click on the login banner finding, I get a lot of detail, including some suggested verbiage to use.
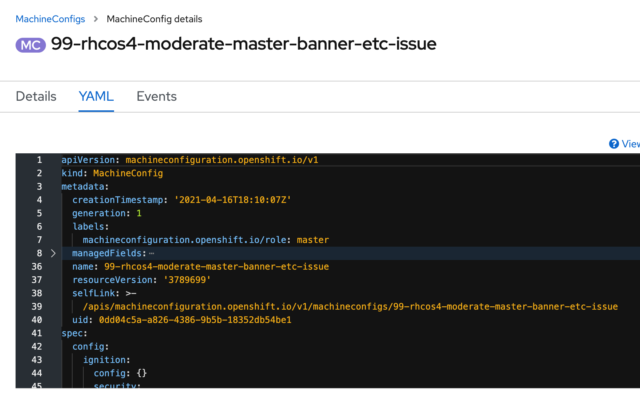
Since I want to modify the login banner and get it applied to all of my master nodes, I will do that with a MachineConfig. MachineConfigs are listed under Compute in the OpenShift console.
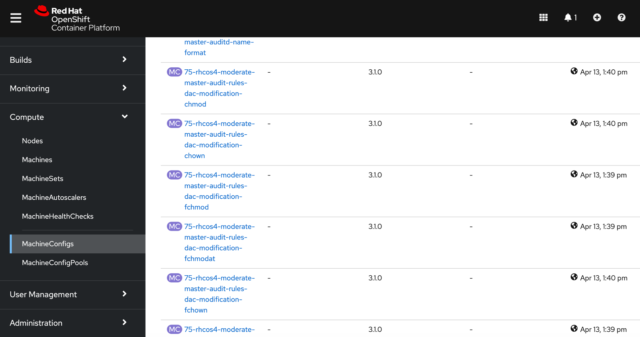
There are two things I’d like to point out. First, the operator’s automated remediations were done by creating MachineConfigs, so the current configuration shows many MachineConfigs. The second thing to point out is that MachineConfigs are applied in alphabetic order. So the operator appended “75” to the front of its configs to place them where it wanted on the list of all the MachineConfigs.
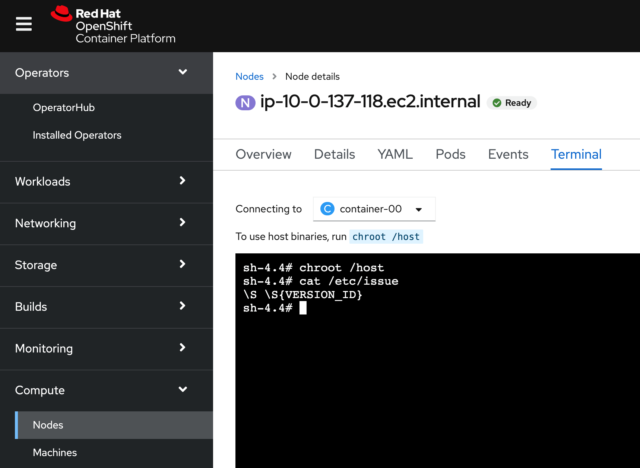
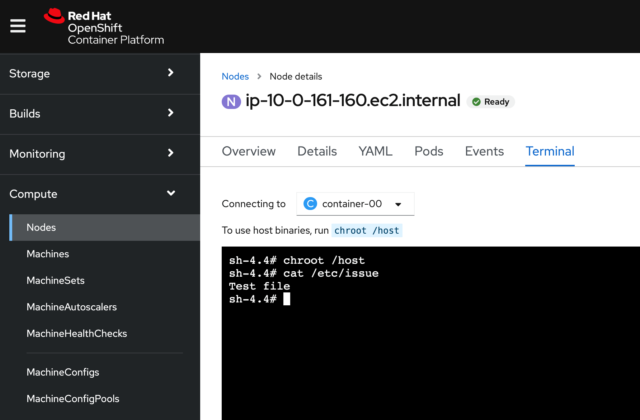
Before I modify the login banner, let’s take a look at what it looks like now. An easy way to do this in the console is to go to the Node section under Compute and pick one of the master nodes. You’ll see a “Terminal” tab, and if I go to that, I’ll get a terminal on my node. Above the terminal is a message that says, “To use host binaries, run chroot /host,” so I’ll do that, and then I’ll cat the /etc/issue file. You can see the results below:
For my MachineConfig, I will put the text I want to use for the /etc/issue file in base64 encoding. For my sample, I’m simply going to change the file to say “Test file,” which probably wouldn’t pass any audits but is fine for this demonstration.
To generate the text, I run this command from a Linux terminal:
$ echo “Test file” | base64
VGVzdCBmaWxlCg==
I’m going to take that line that was generated and use it in my config. Here’s a MachineConfig yaml I used to modify the /etc/issue file:
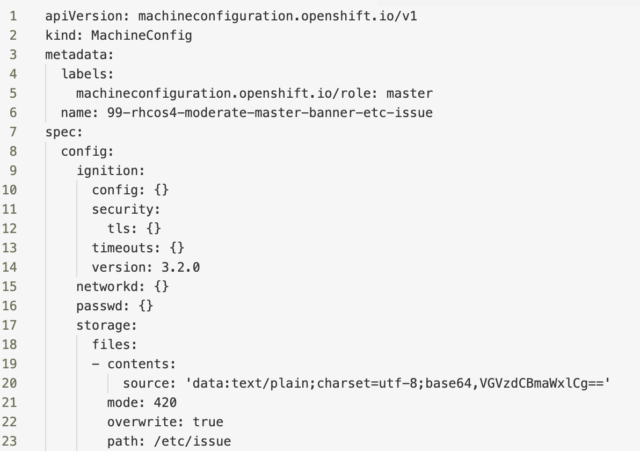
A couple of things to point out in the file. First, notice that the name of my config starts with “99.” That’s because I want it at the end of the list of MachineConfigs. Also, on line 20, you can see where I inserted the output of my text converted to base64. You can apply this YAML file from the command line, as I’ve demonstrated earlier, or within the MachineConfig section of the console, you can select “Create MachineConfig” and paste it into your YAML file.
Once I hit save, the MachineConfig will be applied in a rolling fashion to my master nodes. This will take a little time, so be patient and wait until your nodes show “ready” again. Once that’s done, let’s take a look and see if the settings applied successfully.
Back in my master node in the console under Compute, I select the “Terminal” tab. I’ll run the “chroot /host,” as I did before, and then I’ll cat my /etc/issue file. Here’s what the result should look like:
As I’ve mentioned in earlier posts, you’ll ideally be using a repository and ideally a git-ops approach for modifying and managing your MachineConfigs. Still, this exercise should show you some of the power and capabilities of the Compliance Operator and how it can greatly simplify your security compliance on the OpenShift platform.
References: